As a digitizer, when we digitize designs, sometime client send us back to change stitch type or look of the design, here we will explain different type of stitch types in digitizing.
Every time, the one needle drop on the apparel, it is counted as one stitch, if design has 1000’s of stitches, the needle will drop thousand time on apparel and it will be thousands of stitches in that design. There are only 3 to 4 main type of stitch types and all other stitch types are created from those only, we mainly use Manual, walking stitch, Satin Stitch and Fill stitch in digitizing.
Embroidery digitizing stitch is converting a digital pattern, image, or design to a digital format that can be easily read and interpreted using an embroidery machine. Moreover, the embroidery digitizing process involves using specialized software, which helps create a digital embroidery file. Normally the embroidery machines support .EXP, .DST, .JEF, or .PES and many other file formats as per the machines. These digital embroidery files have instructions that help the machine on how they will stitch these designs. These include stitch types, thread colors, stitch direction, the order the stitches should be applied, colors to be utilized, etc.
There are numerous embroidery digitization approaches, and they have pros and cons. In this blog, we’ll explain all the most common embroidery digitizing stitch types, their uses, advantages, and disadvantages.
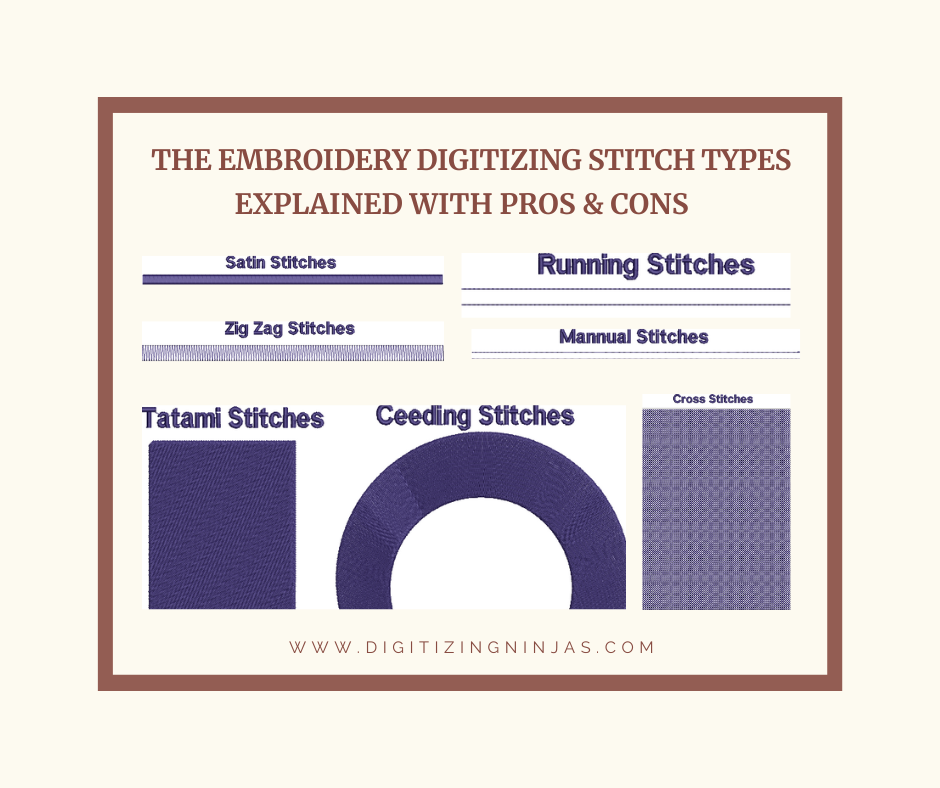
Types of Embroidery Digitizing Stitch
Satin Stitch
Satin Stitch is a more used technique, unlike others. This is a technique that includes the use of a series of narrowly spaced stitches that are parallel to form a smooth and satin-like quality. Satin Stitch digitization technique is more used for outlining objects, borders, and lettering since it generates a precise and clean appearance. Nevertheless, this technique is time-consuming and requires a higher stitch count to attain the desired outcomes. Satin stitch is best used when length of embroidery area in less than 10mm.

Pros
- Suitable for creating solid color blocks
- Generates smooth and satin-like outcomes
- Creates a clean and accurate appearance
- Used for fonts, borders and lettering etc..
Cons
- It’s time-consuming
- Requires a higher stitch count to get your desired effect
Manual Stitch
A manual stitch is a hand embroidery stitch that isn’t precise to any kind of stitch. This kind of stitch is comprised of several basic stitches, which are commonly utilized in hand embroidery. Some examples of manual stitches include Backstitch, French Knot, etc. Each of the different types of manual stitch available has its distinct application and appearance. Exploring these different kinds of stitches will help you to add some creativity and variety to your projects.

Pros
- Enables precise control during the stitching process
- Since it doesn’t need access to specialized equipment or electricity, it can be done anywhere
- The techniques can be used on different materials and fabrics
- Offers an opportunity to improve one of your sewing skills
Cons
- It’s a time-consuming process, more so when working on intricate or large projects
- Needs more physical effort, especially when you are sewing a thick or heavy fabric
- Attaining consistent stitch tension and lengths can be a little bit challenging
Running stitch
This is a simplest and very creative stitches since you can control the stitch length using the software. This machine embroidery type of stitch has a single stitch made in between the two points, and it is similar to the fill or underlay stitch. Moreover, this kind of stitch is utilized for giving details and outlining work. Running stitch is suitable for design details, preliminary stitches, decoration, contours, connecting stitches in between objects, outline designs, quilts, manual under-stitching, etc.

Steps involved when working on running stitch include
- Begin by bringing your needle up from your fabric’s back as your stitch line starting point.
- After that, insert your needle back down into a fabric, and it should be apart from your starting point to help you create a straight stitch.
- Take the needle back up through your fabric’s back, and it should be apart from your first stitch.
- Insert your needle back down into your fabric, and remember it should be apart from your second stitch.
- Repeat the procedure by bringing your needle down and up for you to create evenly-spaced stitches at your stitch line.
- Remember that the stitches should be evenly spaced and of equal length to have a consistent look.
- Keep on stitching in this way up to when you’ll reach the end of your stitch line.
Pros
- It’s the easiest embroidery stitches which makes it suitable for beginners
- Suitable for use in a variety of embroidery methods
- It’s easily executed hence, allows faster stitching
- It’s easily adjusted in direction, spacing, and length, allowing creativity
- Needs less thread, unlike the other embroidery stitches; hence economical
Cons
- Not very strong like other stitches
- Forms dotted or dashed lines
- This can lead to having outlines and texture
Tatami Stitch (Fill stitch)
Tatami Stitch is suitable for getting an aesthetic appeal to the fabric since it’s used to cover spaces that are bigger than 1cm hence covering big spaces. Furthermore, it also offers a smooth appearance, and with the help of tatami effects, you can customize it into different forms and gradients. Nevertheless, this technique makes it challenging to have a smooth and uniform finish.
The excessive use of the fill stitches offers a bulky and stiff final product. It’s suitable for creating various textures ranging from smooth-flat to textured-raised. This file contains rows of stitches that form patterns depending on the needle penetration. Every object that’s made using these kinds of stitches normally has just a single stitch angle.
When creating a fill stitch, you need to consider push compensation, stitch angle, stitch length, pull compensation, edge shape, and density.

Pros
- Offers a very smooth and aesthetic appearance
- Allows different forms and gradients customization
- Best for creating various textures
Cons
- Unsuitable for small stitches
- Hard to have a smooth and even quality
Zigzag Stitch
This type of stitch looks similar to a satin stitch with a left-right stitch. Moreover, the only major distinction between them is the spacing that’s in between the stitches. When the space is very close, then it’s likely to be Satin since, with a zigzag stitch, it moves from angle to angle. In addition, the satin stitch is straight with a single-line angle. Zigzag stitch is majorly utilized for embroidering edges of material to guard the corners or improve the appearance.

Pros
- Best when embroidering fabric edges to guard its corners or improve its look
- Suitable for adding texture, decorative elements, and fillings, versatile
- Smoothly follows curved shapes and lines
Cons
- Needs numerous separate stitches made; hence, time-consuming
- Needs patience and practice
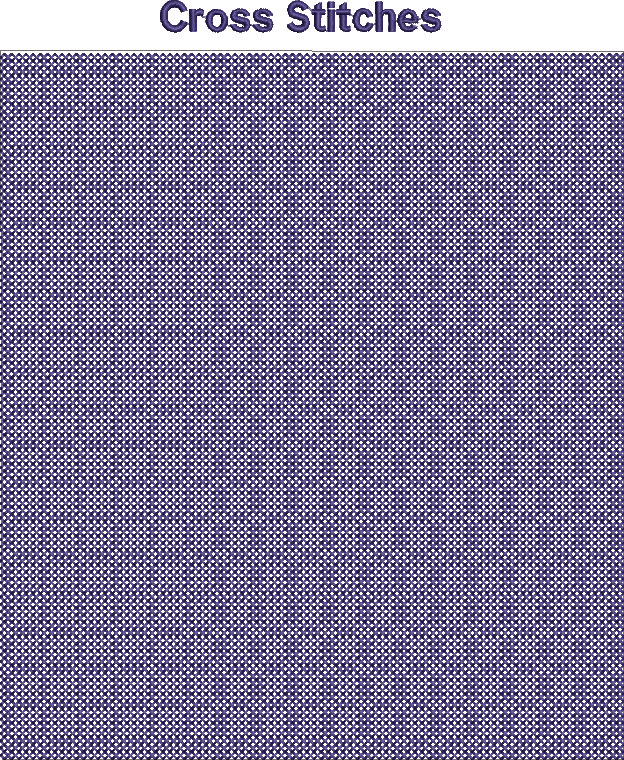
Cross stitch
This kind of stitch is majorly utilized by different kinds of embroidery designers, and it’s among the most utilized stitch type in hand embroidery. Moreover, this stitch type is available with several transitions like a half cross, quarter cross, full cross, etc. Cross stitch involves making X-shaped stitches to create a fabric design. When creating a cross stitch, it is significant to maintain a stitch size and constant tension all through your design. Moreover, work with your stitches in one direction to retain their uniformity. Work from top – bottom and left – right.
When doing cross stitch, always ensure that all stitches cross faces a similar direction, and you can utilize across-stitch charts or patterns for guidance.
Cross stitch is very versatile, and one can use it to make intricate pictures, designs, and lettering. Moreover, it’s a good choice for embroidery enthusiasts, and it’s more used to make contemporary and traditional projects.
Pros
- Suitable for creating several designs including simple lettering, images, or intricate patterns hence versatile
- Helps in creating clear, well-defined designs, and crisp lines
- Offers endless possibilities in shading and color combination
- It’s a portable craft and easy to learn
Cons
- It’s a labor-intensive craft
- Unsuitable for detailed shading
Conclusion
Embroidery digitizing involves changing a design to a digital embroidery file with guidelines for the embroidery machine. This digitized file will state the stitch types, thread colors, stitch directions, and more information needed to create an accurate design. Embroidery digitization is a very important part of any embroidery process since the quality of a digitized file will greatly impact the results.